MCP setup and connection
Switch the server on, find the address, connect your AI client.
Only basic mouse mode is in the current release. That means the accessibility service, double-press OK to toggle, and pointer movement, click, drag and scroll. Hotkeys, the ADB assist mode, Web Input, live translation and the whole MCP server are finished but arrive with the next VxMouse update. Pages and sections marked Next release describe those.
Three steps: switch the server on, find the TV's address, connect an AI client. Replace <tv-ip> below with your own TV's address.
Step 1: switch the server on
- Install and open VxMouse.
- Enable the accessibility service (see mouse mode).
- Scroll to the MCP Server (Model Context Protocol) section and turn on Enable MCP Server.
- The first time, Android may ask for all-files access so the file tools can work. Allow it from the screen it shows.
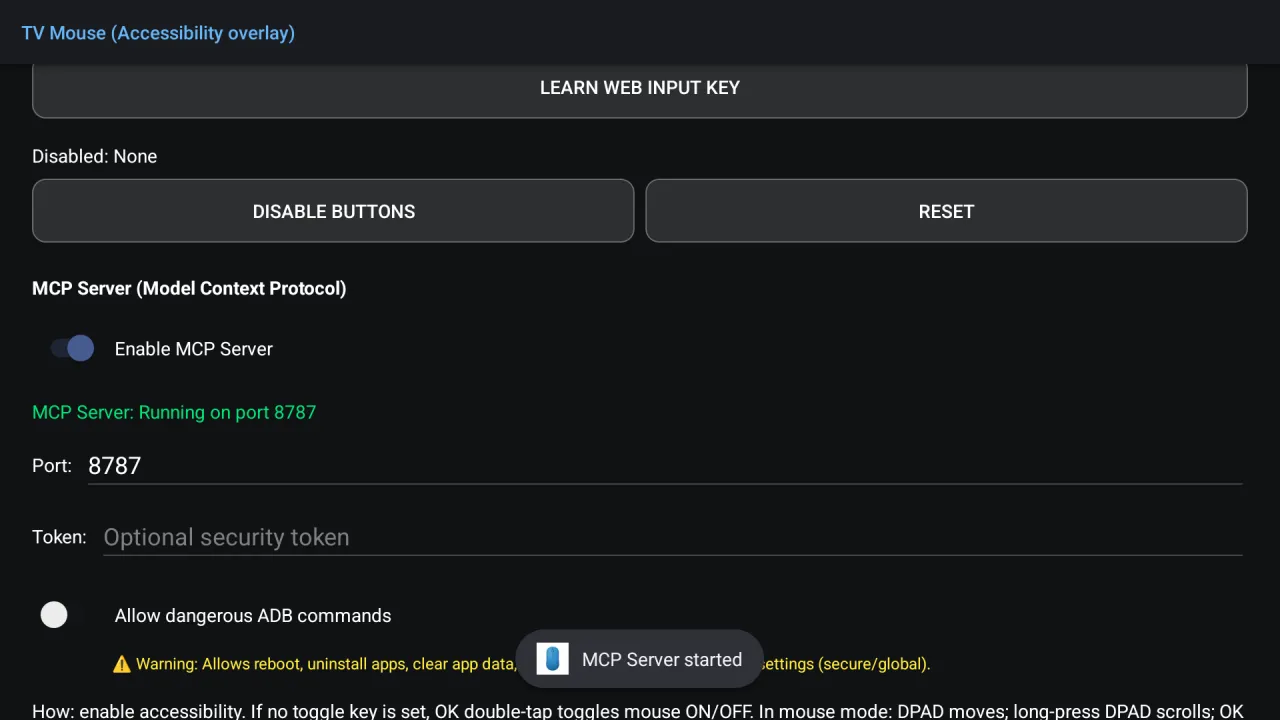
| Field | What it is | Advice |
|---|---|---|
| Port | WebSocket port | 8787 is the default. Change it if something else uses it. |
| Token | Optional password. When set, clients must authenticate first. | Leave empty only on a trusted home network. Set one for anything else. |
| Allow dangerous ADB commands | Lets the shell tool run risky commands such as deletes and reboots. | Off by default. Turn on briefly, only when needed. |
The status line turns green with MCP Server: Running on port 8787 when it is up. If it stays on Stopped, the port is probably in use: pick another one.
Step 2: find the TV address
Use your router's device list or the TV's network settings. On the same network the address is ws://<tv-ip>:8787. From another network, use the USB-forward route in method B.
Method A: Claude Desktop with the bridge (recommended)
You need Node.js 18 or newer and the bridge files (the bridge script, its package file and its config file) in one folder. Install its single dependency once with npm install.
Edit the bridge config:
{
  "vxmouse": {
    "ip": "<tv-ip>",
    "port": 8787,
    "token": "",
    "tls": false
  },
  "connection": {
    "timeout": 3000,
    "keepaliveInterval": 30000,
    "reconnect": true,
    "reconnectDelay": 5000,
    "maxReconnectAttempts": 10
  }
}| Field | Meaning |
|---|---|
| ip, port | Your TV and its MCP port. |
| token | Same value as in the app. Empty means no authentication. |
| tls | Must be false. The server is plain WebSocket. The default of true tries wss:// and fails. |
| reconnect | Reconnects after the TV sleeps or the app is restarted. |
Then add the bridge to the Claude Desktop config file, using the path where you saved it. The config file must sit next to the bridge script.
{
  "mcpServers": {
    "vxmouse": {
      "command": "node",
      "args": ["<path-to>/bridge.js"]
    }
  }
}
Restart Claude Desktop. The vx_* tools appear in its tool list. On the first message the AI is told to call get_skill.
Method B: connect through USB or a forwarded port
If the computer and TV are on different networks, forward the port over an ADB connection, then point the bridge at 127.0.0.1 instead of the TV's address, with the same port, "tls": false and your token. Good for remote support and development.
Method C: write your own client
Any language with a WebSocket library can be a client. Send initialize, then notifications/initialized, then tools/call. This Python sketch shows a toast on the TV:
import json, asyncio, websockets

async def main():
    async with websockets.connect("ws://<tv-ip>:8787") as ws:
        await ws.send(json.dumps({"jsonrpc": "2.0", "id": 1, "method": "initialize",
            "params": {"protocolVersion": "2024-11-05", "capabilities": {},
                       "clientInfo": {"name": "my-agent", "version": "1.0"}}}))
        print(await ws.recv())
        await ws.send(json.dumps({"jsonrpc": "2.0", "method": "notifications/initialized", "params": {}}))
        await ws.send(json.dumps({"jsonrpc": "2.0", "id": 2, "method": "tools/call",
            "params": {"name": "vx_display_toast", "arguments": {"message": "Hi from Python"}}}))
        print(await ws.recv())

asyncio.run(main())
With a token set, send this right after initialize: {"jsonrpc":"2.0","id":99,"method":"auth","params":{"token":"your-token"}}
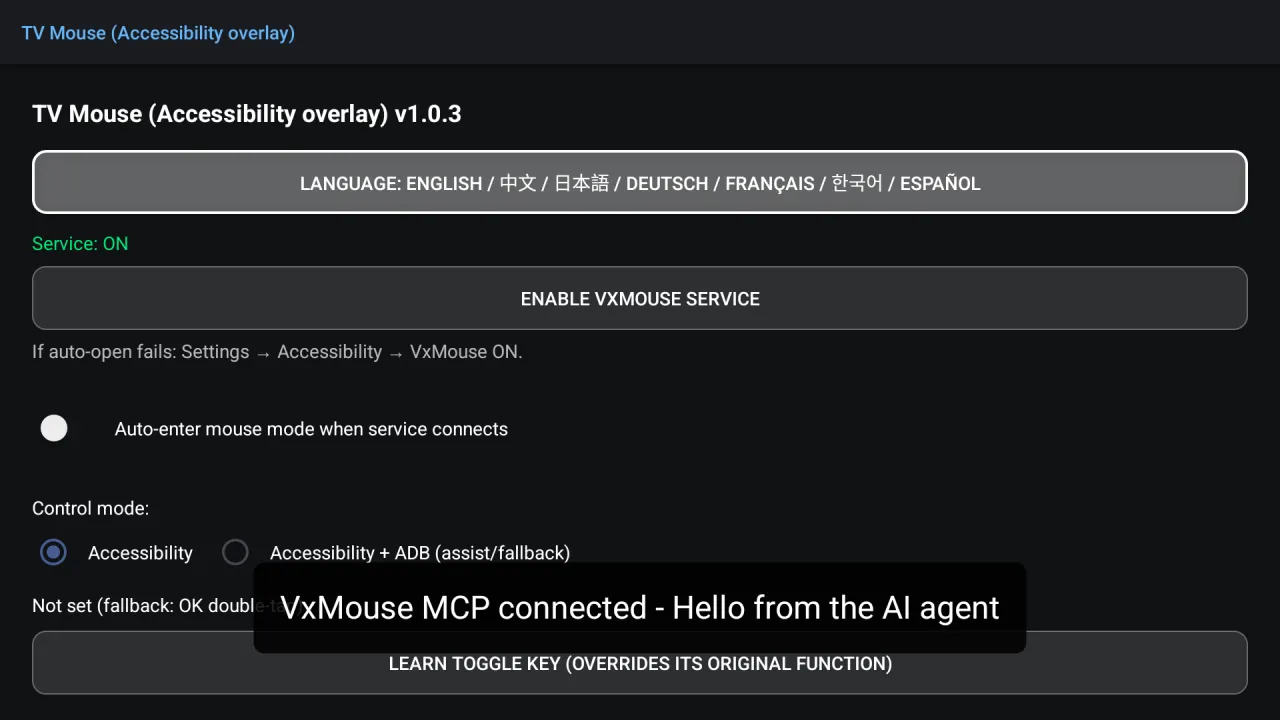
It works when you see this
Troubleshooting
| Symptom | Cause | Fix |
|---|---|---|
| Bridge keeps reconnecting | tls left at true | Set tls to false. |
| Authentication failed | Token differs | Use the same token in the app and the bridge config. |
| Timeout, cannot connect | Different network, firewall, wrong address | Test the forwarded-port method. |
| Tool list empty | Bridge not running or Node too old | Check Node is 18 or newer and read the bridge output. |
| Drops halfway | TV went to sleep or the app was ended | The bridge reconnects. Turn off battery optimisation for VxMouse. |
| Shell tool fails | No ADB channel | Switch to Accessibility + ADB and connect. |
| Server stays Stopped | Port already in use | Choose another port, for example 8788. |
| All-files prompt on switching on | Needed for the file tools | Allow it on the screen the app opens. |
Get VxMouse
VxMouse is distributed to supporters on Patreon and can be installed with GTV-toolkit on Windows.